
The sensor with the widest temperature range isn’t automatically the right upgrade for your 3D printer. If you’re weighing thermistor vs thermocouple vs rtd pt1000 sensor options, don’t focus only on temperature limits. First ask whether your printer’s electronics and firmware can read the sensor correctly. A sensor that physically fits may still send a signal the printer can’t interpret.
Each sensor measures temperature differently, which affects accuracy, response, setup, and the temperatures you can reliably monitor. This guide explains how thermistors, thermocouples, and Pt1000 RTDs work, then compares their practical trade-offs to help you choose for your printer and printing needs. You’ll also learn why wiring, firmware configuration, and calibration matter when changing sensors. If temperature errors persist after you’ve checked the connections and settings, replacing parts by guesswork may not solve the problem. Printer-specific troubleshooting or professional 3D printer repair can help identify the cause and get your equipment back on track.
Key Takeaways
- Thermistors, thermocouples, and Pt1000 RTDs measure temperature in different ways. Pt1000 identifies a platinum RTD type, not a separate sensing principle.
- Compare thermistor vs thermocouple vs rtd pt1000 sensor options by your printer’s supported input and intended measurement point, not temperature range alone.
- Before replacing a sensor, check your printer documentation and identify the existing sensor, wiring, connector, temperature curve, and firmware support.
- Unusual readings can result from a sensor fault, loose wiring, connector problems, incorrect configuration, or the controller. Stop printing if readings seem unsafe or implausible.
- If careful checks don’t resolve persistent temperature errors, printer-specific troubleshooting or professional repair can help identify the underlying issue.
What Are Thermistors, Thermocouples, and Pt1000 RTD Sensors?
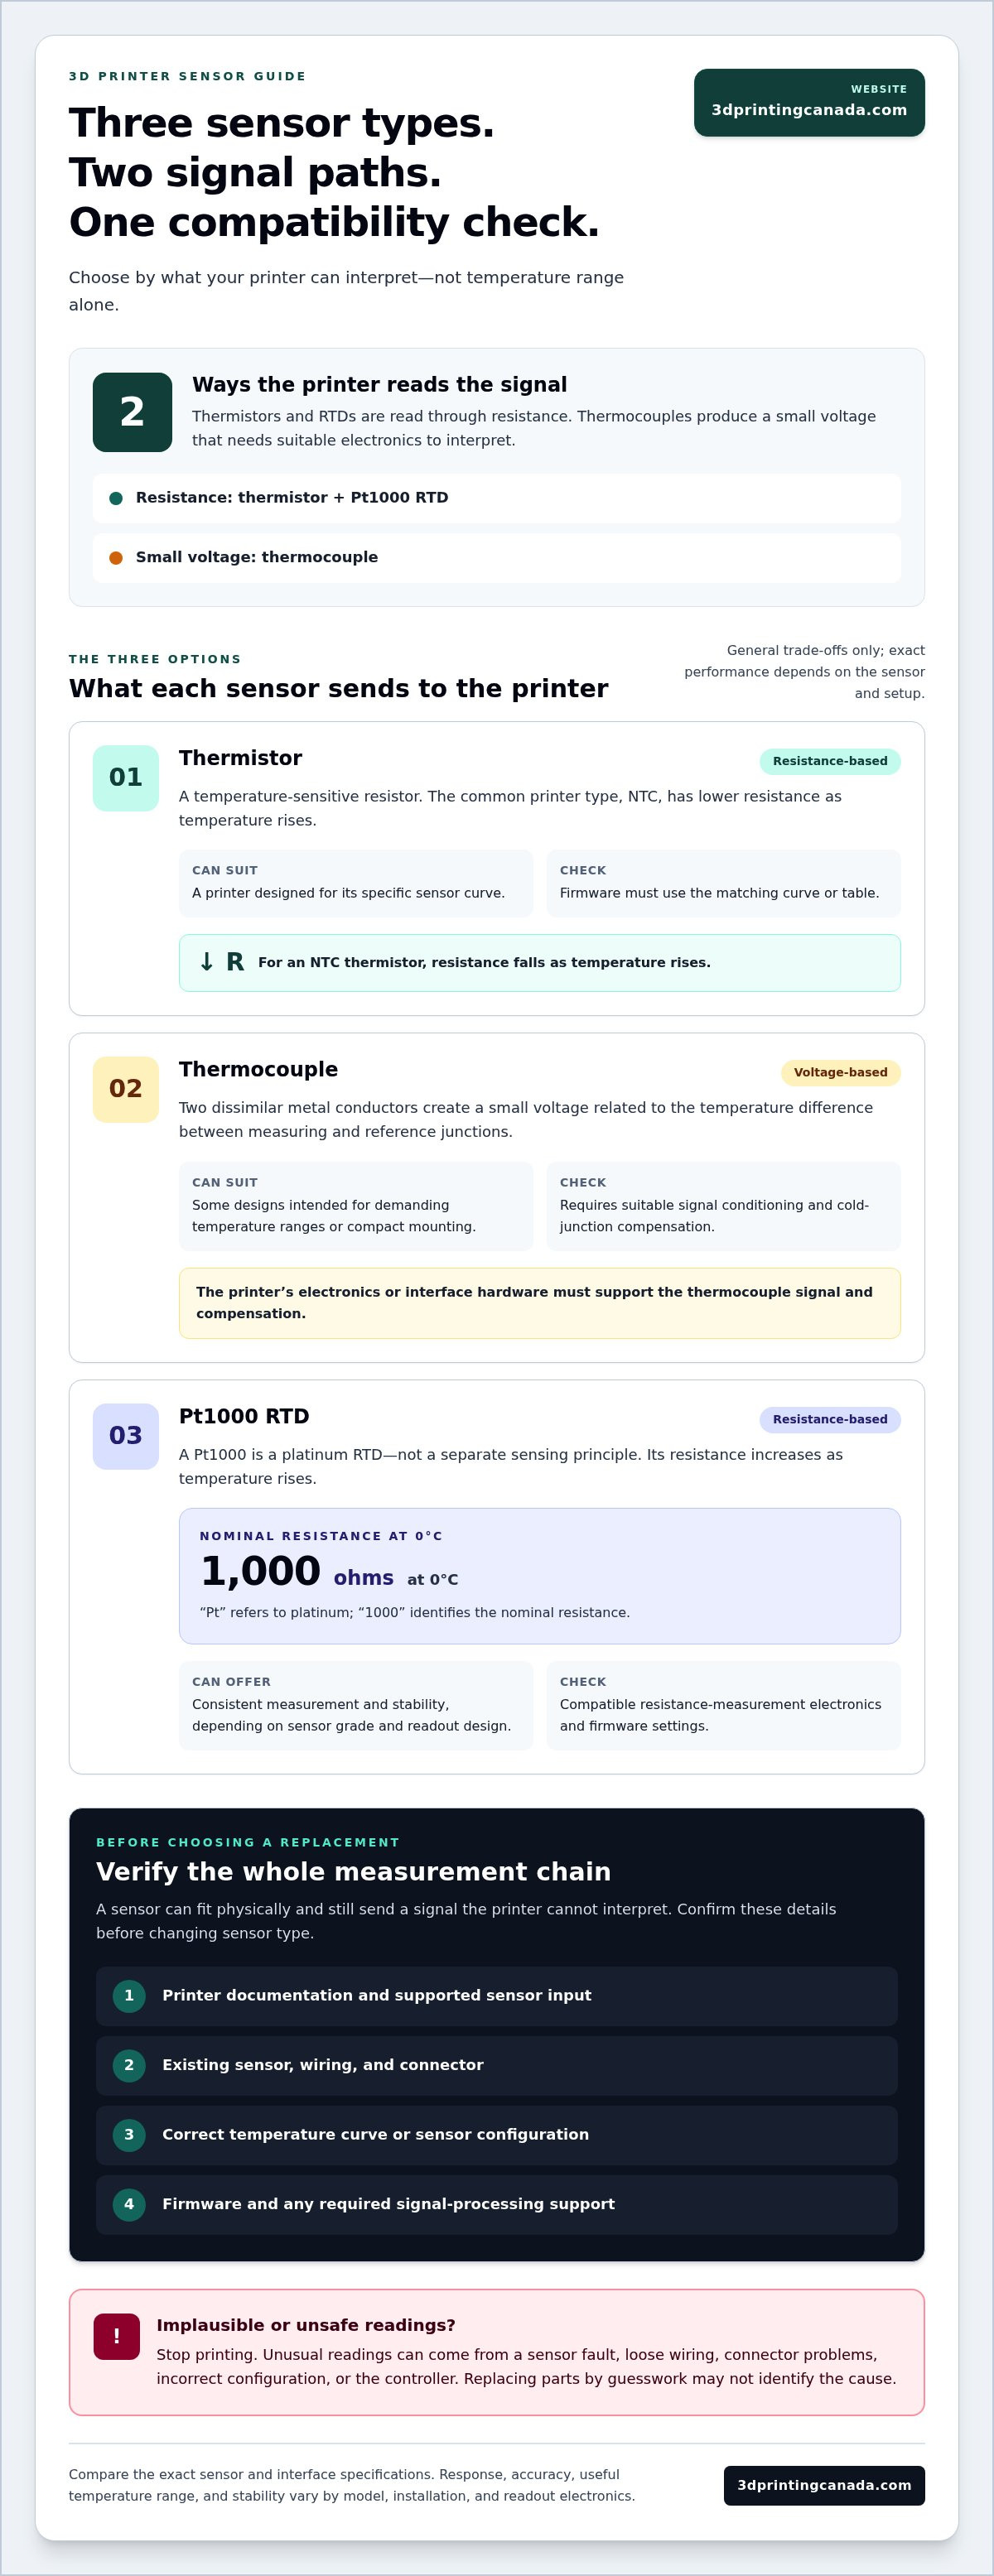
A thermistor measures temperature through a change in electrical resistance. A thermocouple produces a small voltage that varies with a temperature difference, while an RTD measures how a metal element’s resistance changes with temperature. Pt1000 is a type of platinum RTD, not a separate sensing principle. “Pt” refers to platinum, and “1000” indicates a nominal resistance of 1,000 ohms at 0°C.
Printer owners encounter these options when replacing a hot-end sensor, considering a temperature upgrade, or troubleshooting readings that don’t look right. The names describe how a sensor works, but they don’t tell you whether a particular printer can interpret its signal. Thermistors and RTDs are read by measuring resistance and converting it to temperature. A thermocouple supplies a small voltage that its electronics must interpret. That distinction is central to the thermistor vs thermocouple vs rtd pt1000 sensor comparison.
How does a thermistor measure temperature?
A thermistor is a temperature-sensitive resistor. The common type in 3D printers is NTC, or negative temperature coefficient: its resistance falls as its temperature rises. The relationship between resistance and temperature follows a curve, rather than a simple linear change. The printer’s electronics and firmware use a matching curve or table to convert the measured resistance into a temperature reading.
Thermistors can be a good fit for a printer’s existing design, but their curves aren’t universal. Different thermistor types may produce different readings at the same temperature, so one model’s calibration can’t automatically be applied to another. A sensor may fit physically but report the wrong temperature if the electronics or firmware uses the wrong curve.
What do thermocouple and Pt1000 mean?
A thermocouple uses two dissimilar metal conductors joined at a measuring junction. The junction produces a small voltage related to the temperature difference between it and a reference junction. Because the reference junction’s temperature affects the measurement, the readout typically needs cold-junction compensation. The printer’s electronics or interface hardware must handle that compensation and signal processing.
A Pt1000 is a platinum RTD. Its resistance increases as temperature rises, and its nominal resistance is 1,000 ohms at 0°C. The printer must be designed or configured to measure that resistance correctly. A Pt1000 and a thermistor both use resistance, but their resistance-temperature relationships differ, so they require corresponding electronics and firmware settings.
In short, measurement principle, calibration, wiring, and printer support all affect the reading. Start with what your printer can reliably interpret, not just the sensor’s name.
How Do Thermistor, Thermocouple, and Pt1000 Sensors Differ?
The useful comparison isn’t simply which sensor reaches the highest temperature. Each type has different measurement and setup requirements. Real-world performance also depends on the specific sensor, how it’s mounted and wired, and the electronics reading it. Use the table to compare general trade-offs, not as a performance guarantee for a particular printer.
| Sensor | Operating principle | Typical strengths | Limitations and compatibility needs |
|---|---|---|---|
| Thermistor | Measures temperature through a change in electrical resistance, often using an NTC element. | Common in printer temperature systems and can be straightforward to connect when the printer supports its specific sensor curve. | Response, accuracy, useful temperature range, and stability vary by model and installation. Firmware must use the correct curve. |
| Thermocouple | Produces a small voltage related to the temperature difference between its measuring and reference junctions. | Some designs suit demanding temperature ranges or compact mounting needs. | The signal usually needs suitable conditioning and cold-junction compensation. The printer must support the required interface. |
| Pt1000 RTD | Measures the changing resistance of a platinum element, nominally 1,000 ohms at 0°C. | Platinum RTDs can offer consistent measurement and stability, depending on sensor grade and readout design. | It needs compatible resistance-measurement electronics and firmware settings. Range, accuracy, response, wiring, and cost depend on the specific sensor and setup. |
Which sensor offers the range, response, or precision you need?
There’s no universal winner. A sensor designed for a wider temperature range may not suit a printer that can’t read its signal. A small, well-mounted sensing element may respond differently from a larger element or one with less direct contact. Wiring quality and readout electronics also influence the result. Compare the specifications for the exact sensor and interface in their manufacturers’ datasheets. Don’t assume figures for one model apply to every thermistor, thermocouple, or RTD.
What are the practical trade-offs of each sensor?
A thermistor can be a straightforward replacement when its curve matches the printer’s configuration. Choose a different curve without updating the firmware, and the displayed temperature may be wrong. A thermocouple’s voltage signal needs appropriate conditioning, including reference-junction compensation, so a compatible connector alone isn’t enough. A Pt1000 also needs the right measurement input and configuration. Platinum resistance measurement may suit applications where stability is a priority, but check the specific model’s specifications before drawing conclusions about performance.
The right choice depends on the complete measurement system: the sensor, its mounting, wiring, electronics, and firmware must work together. That’s the practical takeaway from any thermistor vs thermocouple vs rtd pt1000 sensor comparison. If readings remain inconsistent after compatibility and configuration checks, professional 3D printer repair services can help address printer-specific issues.
Which Temperature Sensor Makes Sense for a 3D Printer?
Start with the printer, not the sensor’s headline specifications. The right choice depends on your printer model, where you need to measure temperature, and what the controller can read. A hot-end sensor must suit the hot end’s mounting and the printer’s temperature input. A sensor used at another measurement point, such as a heated bed or an external process, may have different mounting and control requirements.
Firmware must also interpret the signal correctly. Thermistor tables or curves, RTD settings, thermocouple signal conditioning, and controller circuitry all affect the reading. A sensor that fits the physical opening can still be unsuitable if its electrical signal or calibration doesn’t match the printer. The thermistor vs thermocouple vs rtd pt1000 sensor decision is a system choice, not a simple swap between parts.
Why do many printers use thermistors for temperature sensing?
Thermistors are common in 3D printer temperature systems, but they aren’t a universal requirement. They can be a practical fit when the printer’s electronics and firmware are designed for the installed thermistor’s resistance-temperature curve. Different thermistors can have different curves, so matching the sensor type to its firmware configuration matters. Don’t assume another sensor can replace it just because the connector or physical dimensions look similar.
When might a thermocouple or Pt1000 be considered?
A thermocouple or Pt1000 may suit a printer setup designed to support that sensor type. Consider a thermocouple only where the hardware can condition its signal and handle cold-junction compensation. A Pt1000 may be appropriate where the controller and firmware support measuring its resistance. Neither is a drop-in upgrade for every printer. Check the specific printer documentation for supported sensor configurations, wiring, firmware requirements, and temperature limits.
Use this quick pros-and-cons summary as a starting point:
- Thermistor: Often a straightforward choice when replacing like for like. Its specific resistance curve must match the printer’s configuration.
- Thermocouple: Can suit supported setups that need this sensing approach. It requires compatible signal-conditioning electronics and compensation.
- Pt1000 RTD: Can be a fit where the printer supports platinum resistance measurement. Confirm the input, wiring, and firmware settings before choosing one.
Before ordering or installing a replacement, identify the existing sensor and check the printer manufacturer’s documentation. Confirm that the supported input, sensor calibration, and firmware configuration all match. If the documentation doesn’t resolve an unexpected reading or compatibility issue, printer-specific troubleshooting is more useful than trying a different sensor by guesswork.
How to Check Sensor Compatibility Before Choosing a Replacement
A sensor can fit the mount and still give the printer a false reading. Before ordering a replacement, review the printer documentation and identify what’s already installed. This compatibility check helps prevent mismatches between the sensor, wiring, controller, and firmware.
- Start with the printer documentation. Find the manufacturer’s instructions for your exact printer model and revision. Look for supported sensor types, temperature limits, wiring diagrams, and firmware settings. A similar-looking part or an online listing isn’t proof of compatibility.
- Identify the existing sensor. Check the printer’s parts documentation and the sensor markings, if accessible. Record its type and any model or calibration information. If you can’t identify it confidently, don’t assume it’s a standard thermistor or that another sensor will work in its place.
- Confirm the electrical interface. Determine whether the controller input is designed for a thermistor, RTD, or thermocouple interface. Thermocouples generally need suitable signal-conditioning electronics, while resistance sensors need a compatible measurement circuit. A matching connector shape doesn’t establish electrical compatibility.
- Check the wiring and connector. Compare the replacement’s wiring, polarity requirements where applicable, connector type, and pinout with the manufacturer’s diagram. Don’t probe or handle wiring while the printer is powered. Disconnect power before inspecting connections, and leave unfamiliar electrical work to a qualified technician.
- Match the temperature curve or sensor configuration. For a thermistor, the firmware’s curve or table must correspond to the sensor. For an RTD or thermocouple, verify that the printer’s electronics and configuration support that sensor type. A configuration mismatch can make the displayed temperature unreliable even if the sensor itself is working.
- Verify firmware support and limits. Check the documented firmware settings and supported temperature range for the exact printer setup. Don’t copy a setting from another model without confirming that its controller and sensor configuration match yours.
How do sensor wiring and firmware affect readings?
The controller must measure the sensor’s electrical signal, and firmware must convert it using the correct sensor type and calibration. A wrong thermistor curve, an unsupported RTD setting, or an incompatible thermocouple interface can produce readings that don’t reflect the actual temperature. If you use a printer ecosystem with model-specific parts, consult its documentation. The Bambu Lab accessories guide provides context on those parts.
These checks are especially useful before making a thermistor vs thermocouple vs rtd pt1000 sensor replacement decision. If the documentation, wiring, and firmware appear correct but readings remain inconsistent, the cause may involve the printer’s controller or another system fault. Explore professional 3D printer repair services for help with persistent printer-specific temperature issues.
Fixing 3D Printer Temperature Sensor Reading Errors
A temperature warning doesn’t automatically mean the sensor has failed. The cause may be a damaged sensor, loose or damaged wiring, a poor connector connection, incorrect firmware configuration, or an issue with the controller. These faults can look similar, so avoid replacing parts based on an error message alone.
Stop the print if the displayed temperature is unsafe, implausible, or inconsistent with the printer’s state, such as a reading that jumps unexpectedly or doesn’t change as expected during heating. Don’t continue heating to see whether the error clears. Follow the printer manufacturer’s shutdown and safety instructions.
What symptoms can point to a temperature-sensing problem?
Messages such as “THERMAL RUNAWAY,” “MINTEMP,” “MAXTEMP,” or “T0 sensor abnormal” can point to a temperature-reading problem, but they don’t prove the sensor itself is faulty. A broken wire, loose connector, mismatched firmware sensor curve, or controller issue can also cause unexpected readings. Note the exact error text and printer model before troubleshooting. Those details help narrow down what to check.
What checks are safe to make?
Once the printer is off and cool, follow only the manufacturer-approved inspection steps. If the manual permits it, look for visibly loose, damaged, or displaced sensor wiring and connectors. Don’t handle wiring while the printer is powered, test a live circuit, or bypass a temperature alarm. If the documented checks don’t resolve the issue, stop there rather than experimenting with sensor types or firmware settings.
Keep the sensor type and configuration in mind. A replacement with a different temperature curve or signal type may produce unreliable readings unless the printer’s electronics and firmware support it. That’s why thermistor vs thermocouple vs rtd pt1000 sensor troubleshooting should start with the printer’s documented setup, not a guess about which sensor is best.
When is professional 3D printer repair the sensible next step?
If the fault persists after basic manufacturer-approved checks, printer-specific diagnosis may be needed to distinguish a sensor problem from wiring, configuration, or controller trouble. For more repair context, see this 3D printer repair services guide.
Record the model, error message, and what you observed, then use that information to guide the next step. 3D Printing Canada provides professional 3D printer repair services for persistent issues. Explore 3D printer repair support when safe basic checks haven’t resolved the problem.
Choose a Sensor Your Printer Can Read Reliably
The best choice in the thermistor vs thermocouple vs rtd pt1000 sensor decision isn’t automatically the one with the broadest temperature range. Match the sensor to your printer’s supported input, firmware configuration, and measurement needs. Before replacing one, identify the installed sensor and check the manufacturer’s guidance for its wiring and calibration.
Unusual temperature readings don’t always mean the sensor has failed. Wiring, connectors, firmware settings, or the printer’s controller may also be involved. Stop printing if readings seem unsafe or implausible, and stick to manufacturer-approved checks with the printer powered off.
If the problem persists, 3D Printing Canada offers professional 3D printer repair services. Customers across Canada can access the company’s online presence and nationwide shipping. Explore 3D printer repair support for a practical next step beyond guesswork.
Frequently Asked Questions
What is the difference between a thermistor, thermocouple, and Pt1000 RTD?
A thermistor and a Pt1000 RTD both measure temperature through changing electrical resistance, but they use different materials and resistance-temperature relationships. A thermocouple generates a small voltage related to a temperature difference. Pt1000 means a platinum RTD with a nominal resistance of 1,000 ohms at 0°C. For the thermistor vs thermocouple vs rtd pt1000 sensor decision, compare the full measurement system, including electronics, wiring, and firmware, not just the sensing element.
Is a Pt1000 the same as a thermocouple?
No. A Pt1000 is a platinum resistance temperature detector, while a thermocouple produces a voltage at the junction of dissimilar conductors. They use different measurement principles and may need different wiring, signal conditioning, and controller configurations. A similar-looking connector doesn’t make them interchangeable. Check your printer or measurement device documentation to confirm it explicitly supports the sensor type and its configuration before installing a replacement.
Can I replace a 3D printer thermistor with a thermocouple?
Not automatically. The printer’s controller, wiring, firmware, and temperature-measurement setup must support the thermocouple. Even if it fits the mounting point, an unsupported sensor may give incorrect readings or no reading at all. Check the documentation for your exact printer model and follow its manufacturer-approved configuration. Stop using the printer if readings appear unsafe or implausible, rather than testing it with an unverified sensor replacement.
Which sensor is most accurate: a thermistor, thermocouple, or Pt1000?
There’s no universal winner. Accuracy depends on the sensor model, calibration, measurement range, wiring, electronics, installation, and operating conditions. A Pt1000 may suit a setup where stability is a priority, while a thermistor can provide useful readings within a system designed for its curve. Compare manufacturer datasheets for the specific sensor and readout components. General differences between sensor types don’t guarantee performance in your printer.
Why are thermistors commonly used in 3D printers?
Many 3D printer designs use thermistors because compatible electronics and firmware can read their changing resistance. The printer must be configured for the installed thermistor’s resistance-temperature curve; different thermistors aren’t automatically interchangeable. Before replacing one, check the printer documentation for the supported sensor and configuration. Don’t assume a generic substitute or a different sensor type will provide correct readings simply because it fits the same mounting point.
What happens if a 3D printer temperature sensor gives an incorrect reading?
An unreliable reading can cause the printer to control temperature incorrectly or stop with an error. The cause could be the sensor, its wiring or connector, firmware configuration, or other hardware, so an error doesn’t prove the sensor has failed. Stop printing if the reading seems unsafe or implausible. Follow the manufacturer’s power-off inspection guidance, and use professional 3D printer repair support if the problem continues after basic checks.